Horizon 安裝與設定
首先透過apt-get下載相關套件:
$ sudo apt-get install -y python-setuptools python-virtualenv python-dev \
gettext git gcc libpq-dev python-pip python-tox libffi-dev
利用 Git 來取的 Horizon 的原始碼,並切換至最新的 Branch 進行安裝:
$ sudo git clone https://git.openstack.org/openstack/horizon.git /opt/horizon -b stable/newton
$ sudo chown -R ${USER}:${USER} /opt/horizon
$ cd /opt/horizon && sudo pip install .
接著複製設定檔範本來進行設定:
$ cp openstack_dashboard/local/local_settings.py.example \
openstack_dashboard/local/local_settings.py
然後編輯openstack_dashboard/local/local_settings.py設定檔,修改一下內容:
COMPRESS_OFFLINE = True
OPENSTACK_HOST = "10.0.0.11"
ALLOWED_HOSTS = '*'

CACHES = {
   'default': {
       'BACKEND': 'django.core.cache.backends.memcached.MemcachedCache',
       'LOCATION': '10.0.0.11:11211',
   }
}

SESSION_ENGINE = 'django.contrib.sessions.backends.cache'

OPENSTACK_KEYSTONE_URL = "http://%s:5000/v3" % OPENSTACK_HOST
OPENSTACK_KEYSTONE_DEFAULT_ROLE = "user"
OPENSTACK_KEYSTONE_MULTIDOMAIN_SUPPORT = True
OPENSTACK_KEYSTONE_DEFAULT_DOMAIN = 'default'

OPENSTACK_API_VERSIONS = {
    "identity": 3,
    "image": 2,
    "volume": 2,
}
更多的部署與設定可以參考 Deploying Horizon與Settings and Configuration。
壓縮 Django 靜態檔案,透過以下指令進行(在/opt/horizon目錄下執行):
./manage.py collectstatic
./manage.py compress
完成後需要安裝 WSGI mod 來提供 Apache2 來執行 Django :
$ sudo apt-get install apache2 libapache2-mod-wsgi
建立一個 Apache2 設定檔/etc/apache2/sites-available/horizon.conf,並加入以下內容:
<VirtualHost *:80>
    DocumentRoot /opt/horizon/

    LogLevel warn
    ErrorLog /var/log/apache2/horizon-error.log
    CustomLog /var/log/apache2/horizon-access.log combined

    WSGIDaemonProcess horizon user=ubuntu group=ubuntu processes=3 threads=10 home=/opt/horizon display-name=%{GROUP}
    WSGIApplicationGroup %{GLOBAL}

    SetEnv APACHE_RUN_USER ubuntu
    SetEnv APACHE_RUN_GROUP ubuntu
    WSGIProcessGroup horizon

    WSGIScriptAlias /horizon /opt/horizon/openstack_dashboard/wsgi/django.wsgi

    <Location "/">
        Require all granted
    </Location>

    Alias /static /opt/horizon/static
    <Location "/static">
        SetHandler None
    </Location>
</Virtualhost>
最後使用該設定檔,並重新啟動 Apache2:
$ sudo a2ensite horizon
$ sudo service apache2 restart
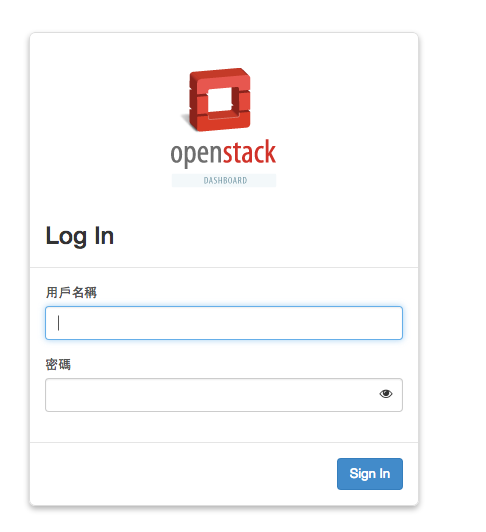
驗證操作
這個部分將描述如何進行儀表板的驗證操作,依照以下兩個簡單步驟:
- 開啟web瀏覽器進入儀表板: Horizon Dashboard。
- 使用admin或demo的使用者登入。
問題解決
若遇到CommandError: An error occurred during rendering的話,檢查是否為 material 造成,若是的話請編輯openstack_dashboard/local/local_settings.py檔案,修改只允許預設風格:
AVAILABLE_THEMES = [
    ('default', 'Default', 'themes/default'),
]